Worx Power Share 20-Volt 9 in. Robotic Landroid Mower, Brushless Wheel Motors, Wifi Plus Phone App with GPS Module Included
$1,467.80
Take the hard work out of yard work with this simple and versatile Worx Lithium-Ion Robotic Landroid L Mower, Brushless Wheel Motors, Wifi Plus Phone App.
In stock
Description
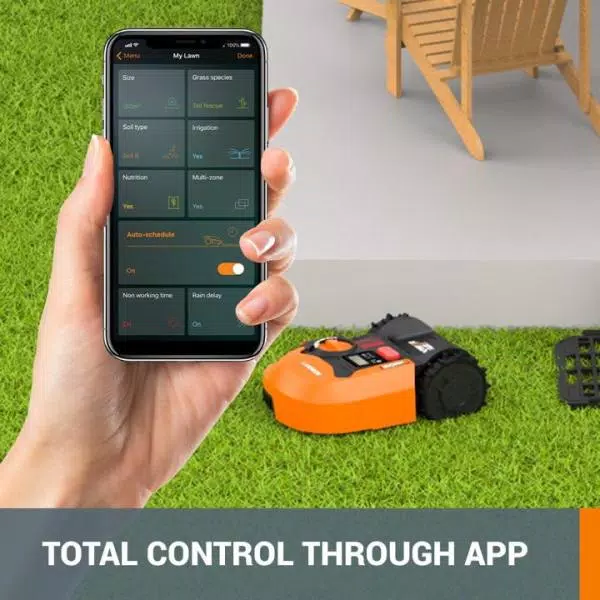
Take the hard work out of yard work. Landroid is easy to install in just a few simple steps. Once you set up the charging base and lay down the perimeter wire, its ready to mow. Landroid is so smart, it builds an algorithm based on your yards specifications. Then, it programs itself with the most efficient mowing schedule for your lawn size. Landroid lives outside, rain or shine. If the weather gets too harsh, it heads back to the charging station to wait out the storm. It keeps your yard perfectly manicured throughout the year, with offset blades that mow close to your lawns border. The razor-like blades cut just a little bit at a time, naturally fertilizing your lawn with the grass clippings left behind. No need to stay home to keep an eye on your mower you can delegate your lawn duties from anywhere. Just download the Landroid app to monitor and control it remotely. The app also lets you adjust Landroids mowing schedule, calculate your lawn size and receive important alerts and software updates.
- [CUTS UP TO ½ AN ACRE] The Landroid L with 9” cutting disc is our model designed to cut up to ½ an acre. Just set the charging base, lay down the boundary wire, measure your lawn with the app, and let it mow
- [FIND MY LANDROID] The Find My Landroid GPS cellular module is included with this model ($299 value). If Landroid is ever removed from your property the app will notify you immediately and give you the ability to track it if stolen
- [DO IT ALL WITH THE SAME BATTERY] Worx Power Share is compatible with all Worx 20v and 40v tools, outdoor power and lifestyle products
- [NAVIGATES NARROW PATHS] Patented AIA technology allows Landroid to navigate narrow passageways too difficult for ordinary robotic mowers
- [CUSTOMIZED MOWING SCHDULES] Have Landroid mow every day, every other day, it can even recommend an auto schedule based on your yard’s size and conditions
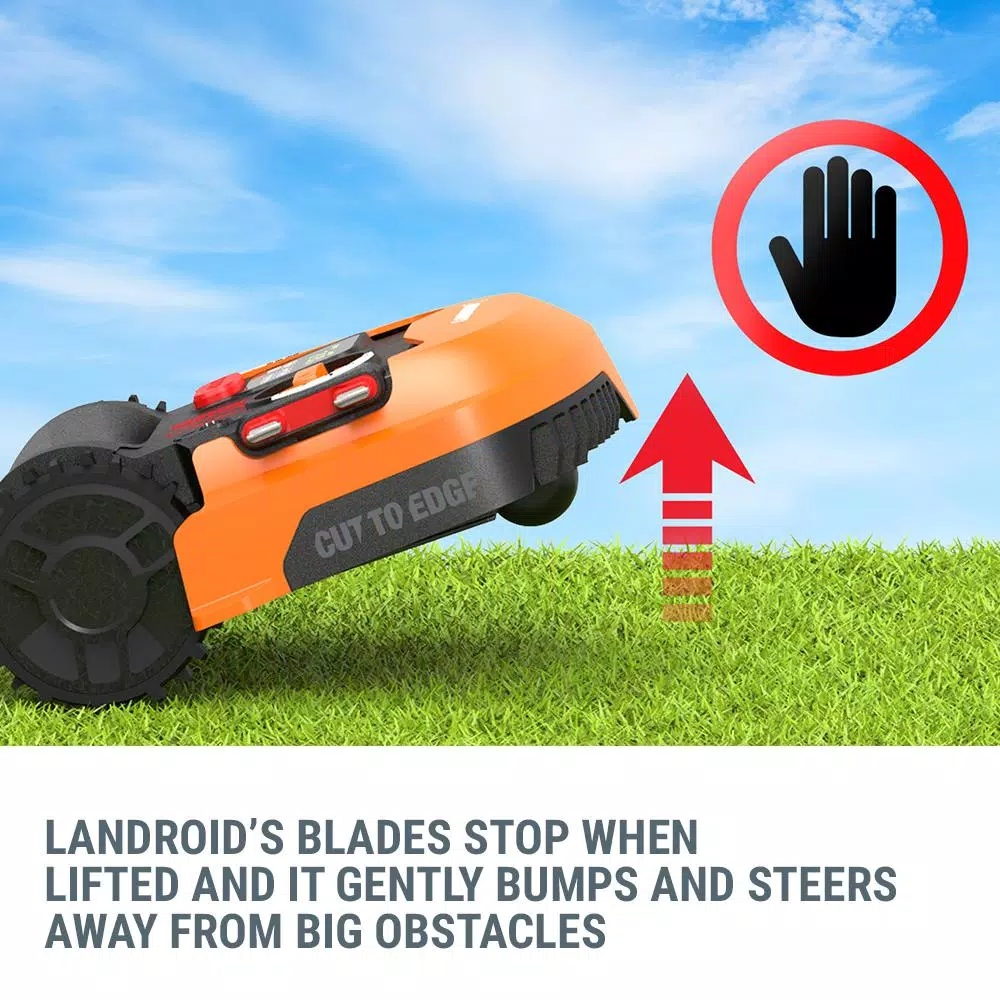
- [TACKLES OBSTACLES] If Landroid encounters obstacles it will bump them and back away, or you can exclude areas of your lawn that you don’t want Landroid to mow. Landroid can also tackle slopes in your yard up to 20°
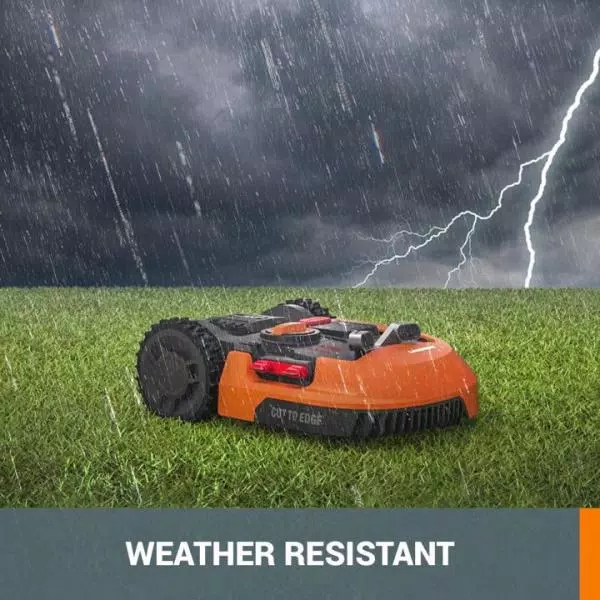
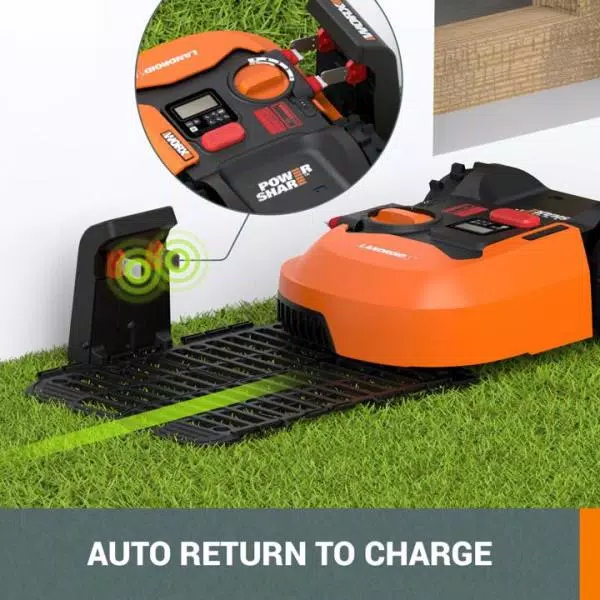
- [RAIN SENSOR] When Landroid detects rain, it returns to the charger to wait until the lawn is dry. Even though its body is rain-resistant, it knows better than to cut wet grass
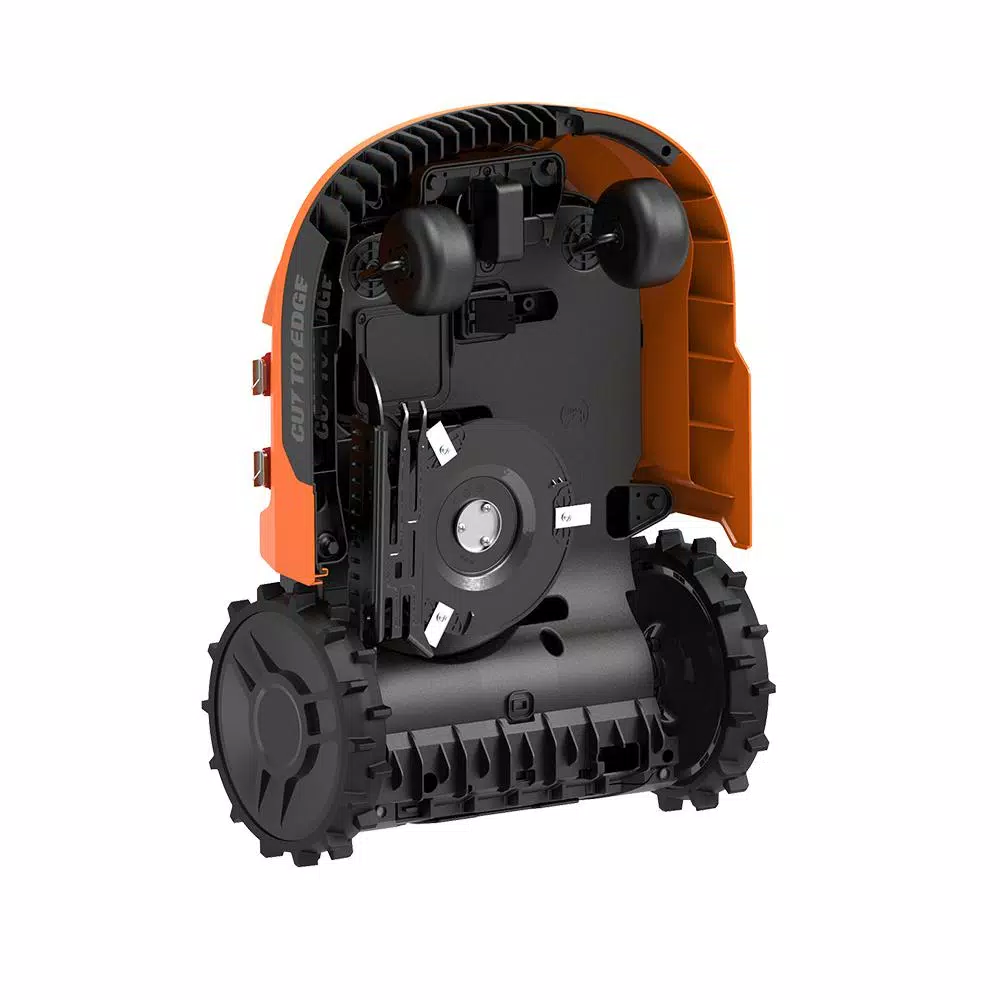
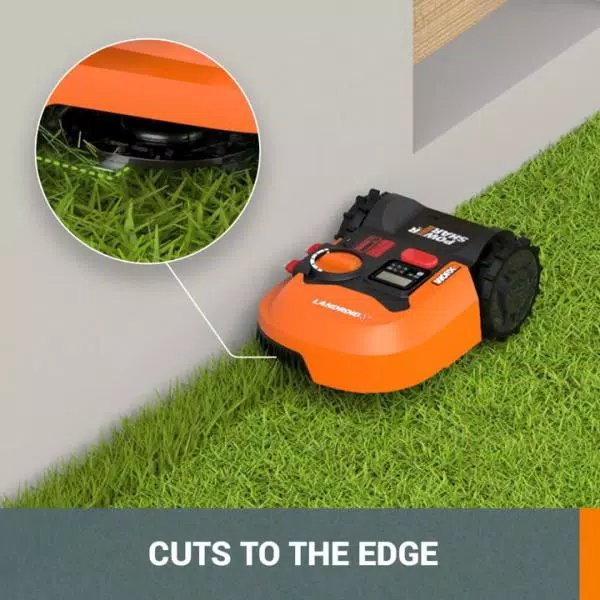
- [CUT TO EDGE] The 9” offset 3-blade cutting disc gets closer to the edge than other mowers, so you have less trimming to do later
WARNING: This product can expose you to chemicals including arsenic, which is known to the State of California to cause cancer. For more information, go to www.P65Warnings.ca.gov
Additional information
| Weight | 22.93 lbs |
|---|---|
| Dimensions | 28.86 × 21.77 × 12.64 in |
| Amperage (amps) | 4 A |
| Deck Type | Fabricated |
| Start Type | Remote |
| Size of Yard | 1/4 – 1/2 Acre |
| Refurbished | No |
| Recommended Terrain | Flat |
| Number of Total Batteries Included | 1 |
| Number of Batteries Required | 1 |
| Model | WR153 |
| Minimum Cutting Height (in.) | 1.5 |
| Maximum Slope (degrees) | 20 |
| Maximum Cutting Height (in.) | 3.9 |
| Lawn Mower Type | Robot Lawn Mower |
| Included | Battery(s) |
| Features | Adjustable Cutting Height, Battery level indicator, Brushless Motor, No Oil Change Required, Rust Resistant, Tool-free adjustments |
| Deck Material | ABS Plastic |
| Area covered per charge (sq. ft.) | 21780 |
| Cutting Width | 8 inches |
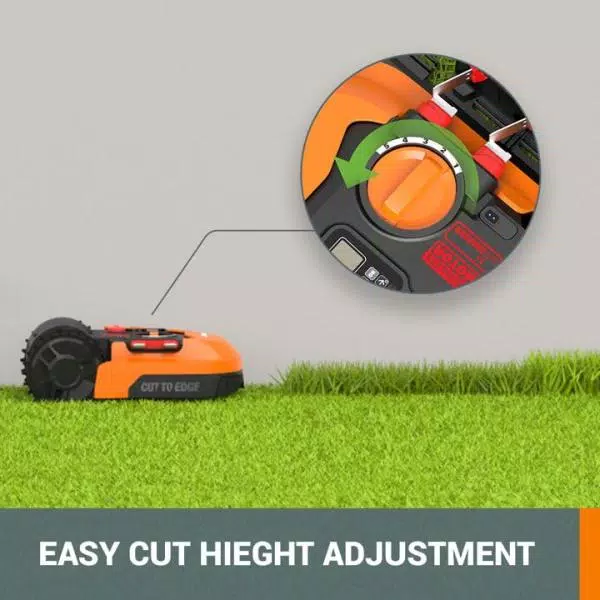
| Cutting Height Options | 5-position |
| Charger Included | Charger Included |
| Charge Time (hours) | 1.5 |
| Battery/Charger | (1) 4 Ah Battery & Charger Included |
| Battery Type Required | 20-volt |
| Battery Type | Lithium Ion |
| Battery Run Time (min.) | 90 |
| Battery Amp Hours | 4 Ah |
| Assembly Required | Yes |
| Assembled Width (in.) | 17.52 in |
| Assembled Height (in.) | 8.86 in |
| Assembled Depth (in.) | 24.8 in |
| Voltage (v) | 20v |
Reviews (18)
18 reviews for Worx Power Share 20-Volt 9 in. Robotic Landroid Mower, Brushless Wheel Motors, Wifi Plus Phone App with GPS Module Included
Only logged in customers who have purchased this product may leave a review.
Related products
Lawn Mowers
Sun Joe Mow Joe 20 in. 12 Amp Corded Electric Walk Behind Push Lawn Mower
Model# MJ408ELawn Mowers
Toro Recycler 22 in. SmartStow High Wheel Variable Speed Walk Behind Gas Self Propelled Mower
Model# 20339Lawn Mowers
Model# 21199Lawn Mowers
Model# 304-14S







Hailie Bernier (verified owner) –
I have had this running in my yard for a couple weeks now and the grass is perfect all of the time. Super easy to use. Love the App also.
Arielle Herman (verified owner) –
I have my Landroid mowing a 450′ x 20′ strip at the front of my house (corner lot). It has 2 types of grass and is anything but smooth. It is maintaining it all week long with a fresh mowed look. Great Product. Envy of the neighborhood.
Ashley Koch (verified owner) –
I’m now three months into the Landroid experience. Installation was an effort…and the tweaking and working on it has been a labor of early evening love. But now that the wire is set the way my landroid likes it…the benefits really are paying off. This whole concept of robot mowers is the future…and it sure is rewarding to be doing it with this very quality product. I’ve had a few small issues and it sure is nice to have very responsive customer service!
Lonnie Nienow (verified owner) –
I have my Landroid mowing a 450′ x 20′ strip at the front of my house (corner lot). It has 2 types of grass and is anything but smooth. It is maintaining it all week long with a fresh mowed look. Great Product. Envy of the neighborhood.
Adelia Stokes (verified owner) –
I love anything that saves me time! Would highly recommend.
Domenic Aufderhar (verified owner) –
It took about two weeks but now I got him working. If you have a little bit of a slope make sure you keep it off the slope as it will side down. Also, roots are an issue for sure, had to get some topsoil to cover them. Overall I am very happy with it now but you will need to do some work to get it to work in a normal yard with trees and bushes.
Jayson Tremblay (verified owner) –
I have a small patch of grass that needed mowing on a regular basis but not big enough to hire someone. The Landroid was the PERFECT solution to my problem. I love it some much it’s on my Christmas gifting list for my sister and brother who has a larger lawn to maintain!
Gloria Bergnaum (verified owner) –
I bought this mower a month ago because I was tired of mowing the yard. The mower does a good job of mowing and I do not have to mow the grass any more. The set up is not easy and requires changes when you find that the mower misses areas. He turns off when he does not know what to do and you have to go rescue him and fix whatever was stopping him.Pros: The grass looks the same all of the time.Cons: It takes a lot of time to get set up.The mower gets stuck and has to be rescued.The mower gets wet and has to be rescued.He does not get close to the edges and corners so you have to edge more.
Gerard Mitchell (verified owner) –
I have a side yard that is on a slope and makes it cumbersome to use a push-mower. This was the perfect area to place the Landroid as I could easily define the cutting perimeter and there were not many permanent obstacles.Installation was simple and painless. The border wire and pegs included were more than enough for installation, leaving extra left over. Make sure that the charging base is on level ground. That was probably the most difficult part since my initial installation area was lacking in flat spaces. I had to create and modify an area for the charging station.Schedule wise, I run the mower for 1.5 hrs, 3 days a week and then again for 2 hours on a weekend day. This keeps my yard looking trim and aways freshly cut. I have the border running adjacent to an area I still cut with my push mower and you can see the difference between the height as the grass outside the boundary grows without being maintained by the Landroid.Because I have a tree with wood mulch around the bottom, I have already had to replace the blades. However, plenty are included for instances like this and I will probably look into one of the accessories to help avoid the area. I didn’t use the boundary wire in my initial placement to create an “island” but I could go back and do that if needed.All of that said, I haven’t had to cut that area with my gas push mower AT ALL this summer. Ive saved money on gas and also have more time to spend with the family since the overall time spent in the yard is cut short; I can save about 20 minutes easily just on mowing alone and only have to edge that area every other main mowing session.The app is pretty neat, but I haven’t honestly messed around too much with it other than registering and checking some of the statistics. It does notify me of any alerts and if the Landroid has started or stopped.
Delphine Bode (verified owner) –
Initially, the Landroid L would worm its way out of the boundary wire everyday, and would subsequently get stuck. This always happened on a slope. A call to customer service revealed it was a known issue that should be solved with a firmware update. The update came in mid-August, 2020, and solved the issue. Now, the Landroid L performs beautifully. I have St. Augustine grass, which gets fertilized as required, and it grows fast! I setup the Landroid to cut everyday from 11am ’til 8pm instead of on Auto. Now, it keeps up with the fast growing grass. Programming is easy. The battery will last about 1 1/2 hours before the Landroid returns for a recharge. Then, out of the garage it goes to continue cutting the grass.
Brown Boyle (verified owner) –
The new landroid has a lot of improved features over the old wg-794 model, which I got from my father after he moved into a condo. I just swapped out the old unit for the new landroid L today and although it has a ton of new features and on paper is great value compared to competitor models with equivalent cutting capacity, in practice, my first run was quite disappointing. I have sandy soil here in coastal South Carolina and the new landdroid got stuck 5 times so far on the first run (wheels dug into grass with sandy patches). The older model didn’t have the same problems. In addition the new model slid out of the boundary wire twice in areas that have a slight incline, but not over the grade it is rated for. It may come down to the new unit being larger and heavier than the old unit so it bugs down easier or is too heavy to stop itself on an incline. I had been hoping the Landroid L would have more sophisticated wheel movement when backing up but it seems the exact same as before. Long story short, the verdict is still put, but initial impressions are not as glowing as I hoped.
Ralph Crooks (verified owner) –
I have had this for a few days and am still tweaking the wire. The lawn looks excellent. I have just under a half acre and about a third of that is on a slope. I have a few comments. The phone app looks really amazing but it crashes after about 2 minutes and you need to delete it and then reinstall. I ended up using my ipad which was stable, but lacks some of the phone features that would make it great. On a slope the robo overshoots the edge and in my case ends up in the brush or in an edging ditch (see photo). On a small incline I leave about 14 inches (wire to edge) on the main slope it’s about 20 inches. Basically the front wheels get stuck and it can’t backup. On the upside of the slope there is no issue. It’s seems to be a great timesaver, and fingers crossed the app will stabilize and I’ll have my wire distance sorted out soon. On a mostly flat lawn this would be a no brainer.
Telly Stiedemann (verified owner) –
My Landroid L has been in operation for nearly 2 months. In a nutshell, I like it, I am glad I installed it, and at the same time I am disappointed in some of its limitations. I am hoping that some of the issues will eventually be fixed with future software updates. For the benefit of anyone contemplating a purchase, please read on.To begin with we have an 8,500 sq ft fescue lawn in NC. Despite the intense heat our lawn is quite thick and grows at a fast clip because we have an irrigation system. Last year I was mowing my lawn about every 4 to 5 days to keep it looking nice. While it is not a large lawn and it is relatively level, there are several features that make it rather complicated for a robotic mower. First, about 900 sq ft of our lawn sits on the other side of a concrete sidewalk with very steep edges on both side (attribute those beautiful edges to the 56V Worx Edger). There are 7 trees the mower must navigate around. Furthermore, we installed steel landscape edging around 6 beds and virtually the entire perimeter of the house. And, as a final challenge to a robotic mower, our backyard is closed off with a gated arbor on both sides.When I reviewed my property with the Worx consultants they said I would have to forgo cutting the strip of lawn on the other side of the sidewalk given how steep the edges were. They also recommended opening both gates to avoid having to cross my driveway. Keeping one of the gates propped open would not be too much of a problem, but I was not about to give up on about 10% of my lawn. Fortunately, I found that the grass was low enough at the extreme ends of the sidewalk and on both sides of the driveway where I wanted to cross that I could get make this work. In my original plan I needed 1,300 ft of wire because I was going to use the wire to form “islands” around my trees, then I read on the site that the maximum length of wire is limited to 1,141 ft. I gave up on the islands and used their magnetic strips to block off the trees. As it is, I installed 1,150 ft of wire and held my breath to see if it would work.I got a few ideas off YouTube for laying the wire and developed a couple of shortcuts on my own to make it possible for two senior citizens to lay the wire themselves. The biggest suggestion is to buy yourself a Rust-Oleum 24” Field & Pavement Marking Wand. Then cut out and attach to the bottom of the wand the cardboard ruler that comes with the Landroid. Use duct tape or heavy packing tape so the ruler sticks out to the right side. Insert a can of marking paint and start walking around your property. You do not need one continuous line, but rather a series of dots. Now follow those dots with an edger to cut a path through the grass down to the soil. Lay your wire, place your pegs and snug it up as you go. I double looped in a several critical areas to allow for adjustment after the fact. One more hint on installation, I covered the exposed cable with small strips of steel cable ties where I crossed the sidewalk and driveway. Hopefully, this will keep me from severing the wire when I do my edging.Once it is all connected, you start troubleshooting. I had to use some shims to level the charging base in both dimensions to stop getting “Missing Wire” error messages. They are not kidding with that 10.3” from hard surfaces, so I had to adjust a number of areas where the mower was coming too close to my steel landscape edging, or where it was falling into the street or on a portion of the sidewalk where it could not recover.Now that it has been running for nearly 2 months, here is what I like:• My lawn consistently looks well-groomed, and I am not out there in near 100F temperatures cutting it every 4 to 5 days to achieve the same effect.• It is handling those sidewalk and driveway crossings with ease. By the way, in the beginning I entertained getting a Husqvarna robotic mower. The fellow brought one over to see how it would handle my sidewalk. It failed; it just could not cross that edging barrier. Just as well because I did not want to spend that much money.Now, for what I do not like:• I simply cannot trust it to operate when I am not around to get it out of a dilemma. Afterall, there is a reason why we call him “Grasshopper.” I fixed most of the real trouble spots, and I think the rest are attributable to software issues that I hope will be addressed in time.• I cannot seem to program the zones.• In fully automatic mode, it only goes through one charging cycle. When the battery hits 9%, it heads back, charges, and displays a message saying it is done for the day.• I wish it had someway to find a shorter way back to the charging base.• My lawn grows so fast that if it skips a patch a couple of days in a row, by the time it does hit that spot the grass seems to too tall for it to cut, so it just pushes it over. At least I found a decent remedy for that. It’s the Worx 40V 14” mower. I just pull that out and hit those spots here and there. Even at that, I am finding that I need to cut my lawn about every 5 weeks or so with my regular mower. At least it is 5 weeks and not 5 days.
Jovany Armstrong (verified owner) –
The hardest part is, laying out the boundary wire. From there, easy peezy.Look at the you tube videos and have fun with it. I have a small yard, and I let it out to cut, as I do cutting and trimming of shrubbery and trees on my property. It cuts my work down 50%.Small yard or big, it works well as a helper. The battery trimmer and edger all work well together to keep things looking good.
Stewart Goodwin (verified owner) –
I really like my Landroid and have only minimally had to use my regular lawn mower since I got it. It’s given me back hours of my life that I can use to do other things. The Landroid itself performs as advertised and the only reason It’s not rated a 5 has to do with the other supplies that come with it. I have a half acre lot in NW Florida, so the soil is mostly sand. The spikes that are used to hold down the perimeter wire don’t hold very well and I have to walk the perimeter often to look for spikes coming up out of the ground. There is not quite enough perimeter wire in the initial kit and I had to buy the kit with additional wire, which still does not quite cover the whole yard. There are also not enough spikes to place them the recommended distance apart – so I have a couple longer stretches with no spikes and the mower has picked up the perimeter wire and gotten it wrapped up in the wheels a couple times. If I had it to do over, I would bury the perimeter wire. I found that the wire wrapping in the wheels tends to happen as the grass gets wet with dew after dark – so I end it at sundown and it hasn’t happened again. It took tinkering with the wire placement for a week or so, but I can now have the Landroid running all day with no problems. I have a very complex yard with sand, a slope down to a stream, and many trees with an area of bamboo growing – it handles it all very well. The only other issue is that sand and grass get caught under the blades – so I have to check frequently to be sure the blades can swing out freely. But it’s definitely worth the little effort that it takes to save the many hours I would otherwise have to spend cutting with a traditional lawn mower.
Milton Veum (verified owner) –
Great product and shipped timely.
Brianne Haag (verified owner) –
I’ve had my Landroid for about 2 weeks now, and so far I’m very happy with it. There are a few tips I would suggest for anyone who’s thinking about getting one. 1. Installing the boundary wire takes longer than you probably think it will. If you have a very small yard – less than 1/4 acre – you can probably lay the boundary wire in 2 to 4 hours, however if your yard is close to 1/2 acre it will take much longer. Make sure you have someone to help you. That will save a lot of time! 2. Do your homework when estimating the size of your yard, and make sure you have enough boundary wire. Also, plan on using more pegs than Worx provides. 3. Be sure to follow the recommended spacing between the boundary wire and objects that your Landroid could rub up against or get stuck under. It’s easy to adjust the wire later, so you’re better off leaving a little extra spacing if you’re unsure. 4. No matter how much time you spend trying to get everything right, you will need to make some adjustments once you start using your Landroid. There will be some areas where the boundary wire will need to be adjusted, and others where you may need smooth out divots in your lawn to prevent you Landroid from getting stuck. 5. Make sure you cut your grass one last time before installing your Landroid, otherwise it will take much longer before your lawn looks good. The Landroid does a good job of maintaining your lawn from that point on. 6. It can handle some pretty steep inclines. I was confused at first at exactly how steep, because some places I read 20 and others I read 35, but I finally realized it’s 20°, which is 35%. 7. You can refresh the status in the Landroid mobile app by dragging downward on the screen.I can’t speak to the reliability of the Landroid, since I’ve only had mine for about 2 weeks, but so far I have no major complaints. Well, maybe one complaint. The troubleshooting documentation could be better. The few times that my Landroid has gotten stuck and stopped due to an error, I had to figure out how to get it started again. The documentation said to just press the Start button, but it wasn’t quite that simple.If you’re considering getting a Landroid, understand that you will need to put some time into the installation of the boundary wire, and it will take a few weeks before you get everything perfected, but if you keep that in mind and have realistic expectations, I think you’ll be very happy with this product!
Cary Weber (verified owner) –
If you are wanting to reduce the amount of time you have to spend each week on lawn maintenance, look no further. This robot has been a game changer. What’s awesome about it?-I don’t have to mow my back or front yard anymore besides for some occasional trimming along the borders-It’s great for the health of my grass because it’s constantly mulching in fine clippings which feeds nutrients into the lawn and doesn’t cause thatch problems. I can also set it to mow low (1.6″) to help promote rhizome growth on my kentucky bluegrass which helps it spread out and fill in bare spots-The algorithm ends up doing a great job covering the entire yard which I didn’t think would be possible with all of the permanent obstacles I have (above ground pool, raised garden bed, sandbox, swingset, trampoline, flower beds, etc)-Surprisingly, I am able to keep my above ground sprinklers and hoses out and the Landroid just travels right over them without cutting up the hoses. Depending on the sprinkler model and size, it might end up grinding away some of the plastic when it runs directly into it but I’ve found some sprinklers where this problem is avoided-If you do your own aerification/overseeding in the fall like I do, you can keep the robot mowing every day even after seeding so your other grass doesn’t get extremely long like it normally does when you have to “stay off the lawn” after seeding. This allows more sunlight to get to your new seedlings and doesn’t allow the lawn to get overgrown like it would when you have a traditional lawnmower where you can’t trample over the new seedlings. What could be improved?-If your lawn isn’t straight forward and has a lot of obstacles, be prepared to spend quite a bit of time initially fixing things that will cause the Landroid to get stuck. It’s not a set it and forget it type thing at first but now I have it nailed down. -When Landroid is returning home to charge, it follows the boundary wire (do or die…nothing can get in its way) until it reaches the charging station. There has been a couple of times where my kids left a big inflatable ball on the lawn that got wedged in a corner of my lawn where the bot has to travel through. What ends up happening is the bot continually tries to push through the obstacle, does a little reverse and then tries plowing over it again, over and over until you get a stuck robot message. If the developers can change the algorithm to make the robot leave the boundary wire, do a short 5ft semi-circle around the obstacle and then rejoin the boundary wire at a later point, that would fix it. Please work on that WORX engineers for your next firmware update!-The off-limits (magnetic strip) module has been a little bit of a hassle that I put around my trampoline. The module didn’t include any instructions so I installed the magnetic strips right next to the trampoline base supports. The bot kept riding right over the trampoline base poles and then it would grind the blades and bottom it out, which caused a blade stuck error. I moved the magnetic strip further and further back from the trampoline base which helped but occasionally it still plows right over the magnets and goes under the trampoline and gets stuck. More importantly, I don’t particularly like the algorithm they used on the off-limits module. As opposed to when it runs into the boundary wire, where the robot will run into the boundary wire and then it will turn 30, 45 or 60 degrees (seems to be random) and go off in a different direction; the off limits module makes the bot do a complete 180 turn when it takes off in the opposite direction. This particularly doesn’t work well in my setup because of my trampoline location. The magnetic strip is really close to the boundary wire next to my fence so it will keep making 180 degree turns and then run into the boundary wire, then bounce off of that, repeat and basically ends up getting trapped which is frustrating. Changing the algorithm for the off-limits module will fix that. In retrospect, I wish I would have just created a virtual boundary around the trampoline with the boundary wire during installation instead of using the off-limits module to zone it off. -If the GPS is precise enough, it would be nice to add some virtual “no-go” areas like you can do with robot vacuum cleaners. I could pinpoint certain places of my yard like the above ground sprinklers, certain sections of my swingset where it used to get stuck (before I added magnetic strips for the off-limits module) and other random areas. Tips and additional info:-I was very concerned how I would be able to get the bot to go from my back yard to the front yard by going through a gate, then through a small corridor on the side of my house and then traveling over my driveway to get to the front yard but it ended up working out great! They tell you not to place the boundary wires any closer than 30″ to each other to avoid interference but I placed the wires a mere 9″ from each other on the section of pavers in my driveway as seen in the pictures and it works just fine! -I wired it across one section of the sidewalk so it could travel from the yard to my front parkway where the mailbox is and it’s working out great as well. -Before installation and laying down the wire, cut your lawn fairly short (the robot will not effectively cut long/overgrown grass) and then use a weed eater to cut a line of grass and make a small groove in the dirt where your boundary wire will be laid. This is a HUGE tip because the grass virtually covered up the boundary wire instantly without having to bury the wire manually. -If you have other WORX tools (like I do), it’s fun to use additional batteries during the first couple of weeks to keep the robot mowing almost all day long without having to charge at the docking station. This was helpful when I trying to understand it’s algorithm, seeing where it gets stuck, fixing/adjusting things, etc. Instead of waiting 1.5-2 hrs for the battery to charge, I would just power it off when the battery got to 9% (which is the point where it heads home to the charger), swap batteries and then send it out to keep mowing. I consistently get 2.5hrs of run time on the included 20V 4aH battery and over 3hrs when I put in a 5aH battery which is very impressive. -During installation, make sure you loop off a 10″ or more section of wire every 50ft or so which you can use in the future for repairs. For example, if you just stake everything down super tight around the entire perimeter; if your wire gets cut, you don’t have enough slack to repair it with the included electrical splices. You can see what I’m talking about in minute 3 of this video which wasn’t released yet when I set my robot up- https://www.youtube.com/watch?v=Vb9rW3xpGpg I hope this review is helpful! The performance and technology behind this robot is amazing and I highly recommend it to everyone!